Category Archives: too much produce

Tomato management

Summer rolls on, and the tomatoes keep coming. We’ve done a pretty good job of managing the volume, having made an adjustment to a greater number of large tomato and fewer cherry tomato plants in the garden this year. It’s a major reason why we keep a journal, so we can improve upon each year based on previous years’ learned lessons. Having recently finished putting up our frozen tomatoes for soup and cooking, we moved onto one of our favorite condiments: barbeque sauce.

A couple of years ago J became interested in making homemade BBQ sauce from our tomatoes. We have no complaints with store-bought, but the problem with large gardens and good growing years is that production often outstrips consumption, even when being generous with the neighbors – and we’ve found absolutely no one who eats the same quantity of vegetables we do. Our sauce recipe was a bit of trial and error (this one is version number six of what we’ve tried) but it’s quickly become our favorite.

Cocktail Farmers Best BBQ Sauce

  • 6 lbs tomatoes
  • 2 cups chopped onion
  • 4 garlic cloves
  • 1 jalapeno (or other pepper with a kick)
  • 2 cups cider vinegar
  • 1 cup packed brown sugar
  • 1/2 cup molasses
  • 1 Tbs crushed pepper (black or red, depending on taste preference)
  • 1 Tbs dry mustard
  • 1 Tbs Kosher salt
  • 1 Tbs smoked paprika

Smoke tomatoes, onion, and garlic on a smoker or charcoal grill for 1-2 hours, depending on the volume of vegetables.

Remove from heat, allow to cool slightly, and then mill with a fine screen:
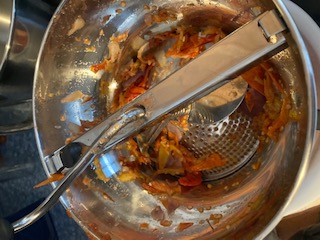
In process

Add spices to the tomato puree and boil until reduced by half.

That is an automatic pot stirrer – like that one coworker we all have, but significantly more helpful.

We made a double recipe over the weekend – we smoked twelve pounds of tomatoes + onion, milled and cooled it, and parked it in the fridge for the evening, then finished the sauce and canned it yesterday. All told, it took about 8 1/2 hours which I realize sounds slightly insane, but so are we. The reduction time for the sauce is really where the hours came in – it was almost 5 to get it down to the righ consistency, but we started with 2x the volume for this recipe, so it should be shorter if you go strictly by what I’ve written above.

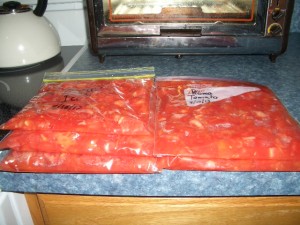
Twelve pounds of tomatoes made 4 16 oz jars and 3 8 oz jars:

My house has smelled amazing for two days, and I can’t wait to do a brisket in a few weeks.
Now we’re cooking

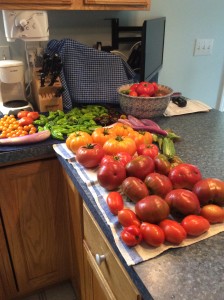
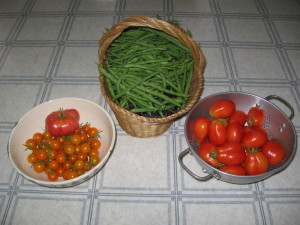
I can stop complaining about the lack of vegetables now:

Harvest on 8-14
Harvest on 8-14

Harvest on 8-17
Harvest on 8-17

This was a lot of stuff to come in all at once.  It looks very impressive, posted on Facebook.  I had several offers to, “….take some of that off your hands.”  So kind of those folks!  Where were they when I was on my hands & knees for four hours, weeding?

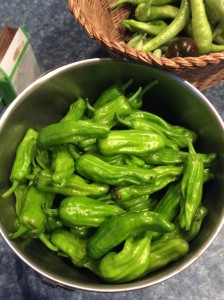
In the end, we put up 5 jars of pepperoncini peppers:

PepperoncinisI found a great recipe for pickling them on Food.com. Our first batch tasted a little mushy, probably from the length of time they sat in the canner until I was able to finish stuffing all the jars and bring it to a boil.  This time we stuffed the jars, filled the brine, removed the air and then put them all into the canner at once.  We’re hoping this makes them crisper.  The ones available commercially taste too bitter to me, so if they are just a little crunchier, they will be perfect.

We’ve got some beans coming, too:

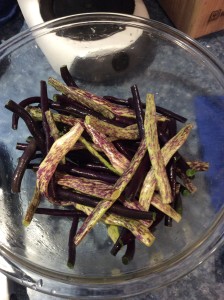
Anellino di Trento and Royalty Purple bush beans

We grilled these with a little bit of olive oil, lemon juice and dill and they were fantastic.  We’re enjoying the beans more than normal, given that just three weeks ago we thought they were a total loss.  Something was getting over our fence and eating the bushes.  We suspect a woodchuck, and so we set up the electric fence around the wire one.  Problem solved.

After picking all those tomatoes, we parboiled, peeled, seeded and diced them into 2-cup quantities and froze them.  We ended up with 2 bags of Krim, 3 bags of Kellogg, and a bag each of Brandywine and Roma.  But we didn’t freeze all of them:

2014-08-17 19.22.33That is a Tomato Stack Salad with Corn & Avocado.  It is delicious.  We used Krim, Kellogg and Brandywine, plus corn, fresh chive and basil from the garden in the dressing.  We have been waiting all season to make that stack of deliciousness.  It was worth the wait.

In a fit of optimism, I planted 191 Knight peas in the back 40 yesterday.  Average time to harvest?  56 days.  That puts us somewhere around October 12, give or take depending on how warm fall is.  I may have wasted $1.50 in seeds if we have an early frost.  This is my idea of living dangerously.

You say tomato, I say enough already

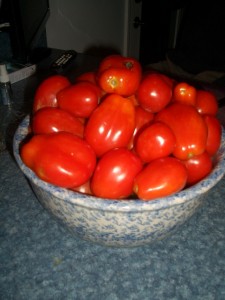
The tomatoes keep coming – every week we are filling a large bowl full of Roma, Mortgage Lifter, Brandywine & Kellogg tomatoes:

CIMG6833

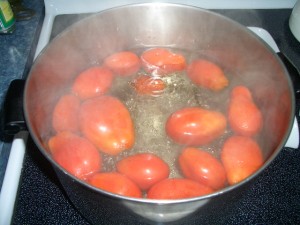
This particular bowl full is just Roma, Brandywine & Mortgage Lifter.  I have done some extensive reading on the internet about canning tomatoes, but I have a high degree of fear about botulism (who wouldn’t?) for anything that does not involve vinegar, so I have been opting to freeze the tomatoes.  But first I have to prepare them.  Step one, plunge into boiling water for about a minute to loosen the skins:

CIMG6834

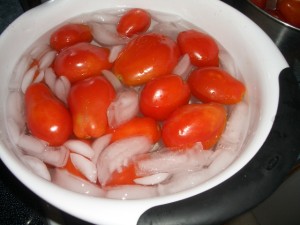
Step two, drop into ice water:

CIMG6835

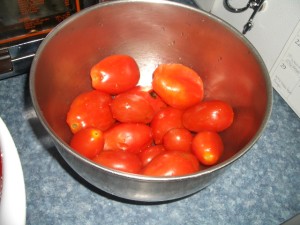
Step three, drain and place into a separate bowl:

CIMG6836

Steps four, five & six – peel, seed and dice the tomatoes.  (Infinitely too messy to do and use my camera, so no photos.)

Step seven – measure out into two cup increments, put in Ziplock bags, and prepare for freezer:

CIMG6837

Step eight – repeat weekly, sometimes twice in a single week.

I know this winter when I am pulling them out for soups or chili or some other recipe that calls for diced tomatoes I am going to be so happy I put all this effort in, week after week, preparing and freezing these tomatoes.  But right now I’m on step nine – pray for an early killing frost.

The bounty continues

Today’s haul:

Veggies_22AUG13

This is on top of an additional 25 Roma tomatoes, 2 Kellogg, 2 Brandywine & half pint of Sungolds that are up on the counter.  And I’m not seeing Stella Caroline this week.  I wonder how much it would cost me to FedEx….?

The green beans in the photo are Kentucky Wonder pole beans.  I have been calling them Kentucky runner beans, which is only half true (they are running away from us, so that part is true.)  Kentucky Wonder is a very old heirloom that has been known by many other names over the years, including  American Sickle Pole, Eastern Wonder, Egg Harbor, Georgia Monstrous Pole, Improved Southern Prolific, Missouri Prolific, Old Homestead Pole and Texas Pole.  An online catalog describes them as, “…..very reliable, early maturing, and productive.”  They should really use the word “prolific” in the bean name, because that might give me pause when calculating how many to plant.  I would also rewrite the description to say, “Very reliable, early maturing, and will bury you and everyone you know in beans.”  But this is mostly my fault – I put in 6 hills of the beans, with 8 bean plants per hill.  And I’m pretty sure every one of those suckers came up.  So, 48 plants.  Next year, for the love of Pete, someone please remind me that this is too many when I’m all excited in the middle of May to plant the beans.  I need someone to come stand in the field and shout at me when I start trying to rationalize and say things like, “But they might not all come up!” or “What if some of the plants don’t produce?”  They will all produce, apparently.

Underneath our Kentucky beans are our usual purple bush beans, and to the right are Roma tomatoes (totally out of control this year, the plants are tipping over from the weight of the tomatoes) and the left is a bowl of Sungolds with a Brandywine for a little change of color.  There are too many Sungolds to fit in the ceramic pint container I usually keep them in.

So this batch of beans will be the first batch that I freeze.  The best way to preserve beans through freezing is to blanch them first, to kill off any bacteria or enzymes that might cause them to become discolored during the freezing process.  I usually submerge them for 3 – 4 minutes, then plunge them into ice water and dump them into a strainer before laying them out on towels to fully dry before freezing them in freezer bags.  My online research tells me that they are best used within a 10-month period, but I have found that they are fine up to and past a year later.  Why yes, we do have beans frozen from last year in our freezer, however did you guess?

It does amount to a hill of beans

“More grows in the garden than the gardener sows.”…Old Spanish Proverb

This was spectacularly true for our bean crop this year.  Last year we got about 2 meals’ worth of beans out of the garden.  Admittedly, we did not plant a lot of plants – maybe 30?  This year, with the addition of the back-40 field, I put in a lot of beans (and peas) in the main garden and out back.  How good could they really do?  Perhaps we’d get 4 meals’ worth, if we were lucky.  What’s that old saying?  Man plans, God laughs?  Exactly.

We’re growing both green bush beans and Royalty Purple Pod Beans.  We’ve eaten some for dinner a couple of times, given a lot away, and then this past weekend, when we returned from vacation, we picked all this:

Which I estimated was approximately 10 pounds of beans.  We gave away three equal quantities to our neighbors, and kept one for ourselves.  Our other neighbors, who also garden and are also buried in beans, made vague suggestions about doing a joint canning operation this week.  We shall see.  But just in case we don’t, and for some reason your CSA has buried you in beans, here are two great recipes for beans I really enjoy. 

Italian Green Bean Salad
by Kathy Kittell of Lenexa, KS – courtesy of Healthy Cooking June/July 2008

1 1/2 lbs fresh green beans, trimmed
1/2 cup fresh basil leaves, thinly sliced
1/2 cup thinly sliced roasted sweet red peppers
1 tbs pine nuts, toasted
2 tbs + 1 1/2 tsp olive oil
1 tbs lemon juice
1/4 tsp garlic powder
1/4 tsp pepper
1/8 tsp salt (I always omit this)
Additional fresh basil leaves, optional

Place beans in a large saucepan and cover with water.  Bring to a boil.  Cook, uncovered for 8 – 10 minutes or until crisp-tender.  Drain & immediately place in ice water.  Drain & pat dry.

Transfer to a salad bowl; add the basil, peppers and pine nuts.  In a small bowl, whisk the oil, lemon juice, garlic powder, pepper & salt (if using.)  Drizzle over bean mixture and toss to coat.  Garnish with additional basil if desired.

And here’s the recipe I made last night:  It’s a grilled green bean recipe, but I put everything into a microwave steamer bag and cook it for about 5 -6 minutes.  I wish I could figure out a way to keep the beans from turning green when they cook, because I think this would be a fabulous splash of color on the table if I could get them to stay purple.

Asian Grilled Green Beans
by Trisha Kruse of Eagle, ID – courtesy of Healthy Cooking (year unknown)

1 tbs brown sugar
1 tbs sesame oil
1 tbs reduced-sodium soy sauce
2 garlic cloves, minced
1/2 tsp crushed red pepper flakes
1 1/2 pounds fresh green beans, trimmed
1 medium red onion, halved & thinly sliced
6 medium fresh mushrooms, quartered

In a large bowl, combine the first firve ingredients.  Add the beans, onion & mushrooms; toss to coat.  Place half the vegetables on a double thickness of heavy-duty foil (about 18″ square); fold foil around vegetables and seal tightly.  Repeat with remaining vegetables.

Grill, covered over medium heat for 18-22 minutes or until beans are tender, turning packets over once.  Open foil carefully to allow steam to escape.

(Or put everything into a microwave steamer bag for 5-6 minutes – much easier.)

Perhaps fewer bean plants next year.  Perhaps.

Cooking when your kitchen looks like a farmers’ market

One of the sad facts of growing a garden is that inevitably everything is ripe at the same time.  And when you’re expecting to get wiped out by a hurricane, you tend to hasten the harvesting just a little.

So it’s critical to find a recipe that uses a lot of vegetables.  Enter Rachael Ray’s grilled ratatouille boats.  (Making ratatouille always reminds me of the Disney cartoon of the same name, which is what inspired a burning desire in me to go to Paris.  Go figure – I based a vacation on a cartoon mouse.)  Anyway, the recipe:

2 zucchini, halved lengthwise
3 tbsp olive oil
1 onion, chopped
2 cloves of garlic, grated
1 eggplant, cubed
2 tomatoes, chopped
1/4 cup parsley
Salt & pepper
1/3 cup shredded mozzarella cheese (although I prefer Asiago for the bite)

Cut zucchinis in half lenthwise:

Scoop out some of the seeds, the scoop balls of flesh from the center of the zucchini to create the boats (a melon baller works well, but I just uses a teaspoon, since I don’t have a melon baller.  Psst, mom – Christmas gift idea!)  Heat 1 tbsp of the olive oil in a large skillet over medium heat, add the onion & cook for 5 minutes, then the garlic and cook for another minute.  Add remaining olive oil (2 tbsp, if you’ve not been keeping track) the eggplant and zucchini balls, and cover & cook 8 minutes.  Add in the tomatoes and cook, stirring, until the mixture is thick, about 5 minutes.  Add parsley and season with salt and pepper.

Fill the zucchini shells with the ratatouille mixture, sprinkle with cheese and grill, covered, over medium-high until the cheese is melted and the shells are slightly softened.

So that’s Rachael’s version.  I used parsley and basil, swapped the mozzarella for asiago and added fresh peas because they were loitering in the basket and there weren’t enough for a meal. Which is how I got from this:


Pretend those cucumbers are zucchini

 To this:

It’s enormously satisfying to sit down to a dinner where pretty much everything in it came out of your garden.