Too much of a good thing…..

I now find myself searching for new and inventive ways to prepare beans.  Remember last weekend’s bean haul?

Welcome to this week’s:

Beans are the 2012 squash & zucchini problem we normally have.  I’ve taken to handing out recipes with the bags of beans.  When people aren’t shushing their children and pulling their shades when they see me coming.

The sweet taste of success

Last year we tried, and failed, to grow watermelons.  Our selected brand of choice was Sugar Baby, a small volleyball sized fruit noted for sweetness and quick ripening. One of the major problems of gardening in New England is that sometimes Mother Nature smites you with a frost the second week of September. 

Our plants last year got to be about 8-10″ long, produce a few watermelons the size of golf or tennis balls, then shriveled up, died and rotted.

We were undeterred, however – only after trying something a couple of times and failing will we give up, so we used seeds saved from last year and planted seedlings this year, then transferred the seedlings out to the garden in mid-May.  The plants grew, the fruit grew, and everything seemed to be unmolested by bugs.  Hurrah!

Returning home from vacation this past weekend, we were confronted by basketball-sized fruit, dark green on the outside:

We Googled “how to tell if watermelon is ripe” and learned that you can:

a.)  thump them – if they sound hollow, it is usually ripe;
b.)  look for the spot where the melon rested on the ground – a yellow-white, yellow or a cream-yellow color spot suggests ripeness and a white or pale green spot indicates immaturity. A green watermelon will have a white bottom; a ripe melon will have a cream- or yellow-colored bottom;
c.) check the “pigtail” or tendril closest to the melon on the vine – when begins to shrivel and dry up. If it dries while the leaves and rest of the vine looks good, the melon should be ripe;
d.) crack a few. You’ve got a whole field of watermelons, and you can practice a little, right?

Er, no – we have exactly three watermelons, so the margin of error is non-existent.  Also, there are no pigtail tendrils on our watermelons so we had to rely on a.) and b.) to decide whether or not to pick a watermelon.  I would have let them go a few more days, or probably until next weekend, but J was really eager, and what do I know about yellow-white vs. white anyway?  Better to let him take the shot in the dark and pick it, although cutting it was my responsibility:

The watermelon is not quite as sweet as some we have had but J swears it tastes better because it came from our yard.  I would agree – and you don’t get much fresher than having watermelon with dinner that you picked 20 minutes before.

The remaining 2 watermelons are still out in the patch and will be picked in successive order as soon as they are needed.  We’re calling victory on this one.

“When one has tasted watermelon he knows what the angels eat.” – Mark Twain

It does amount to a hill of beans

“More grows in the garden than the gardener sows.”…Old Spanish Proverb

This was spectacularly true for our bean crop this year.  Last year we got about 2 meals’ worth of beans out of the garden.  Admittedly, we did not plant a lot of plants – maybe 30?  This year, with the addition of the back-40 field, I put in a lot of beans (and peas) in the main garden and out back.  How good could they really do?  Perhaps we’d get 4 meals’ worth, if we were lucky.  What’s that old saying?  Man plans, God laughs?  Exactly.

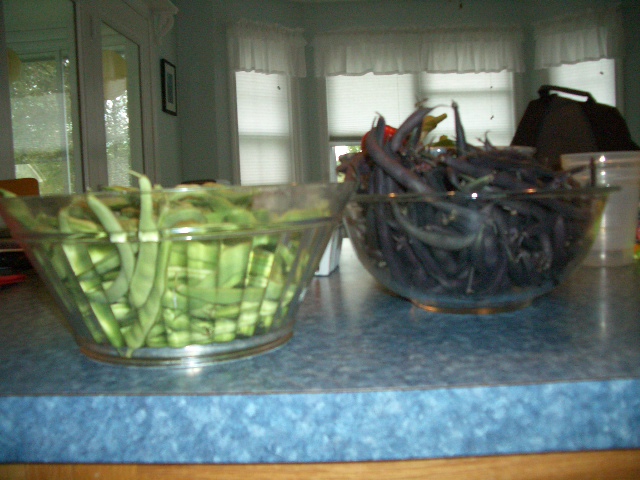
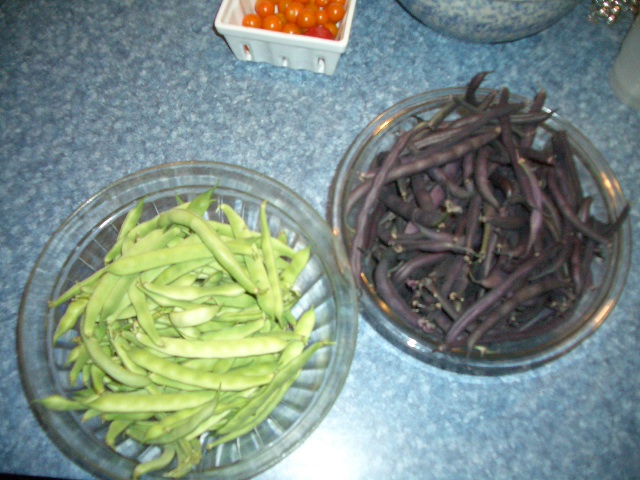
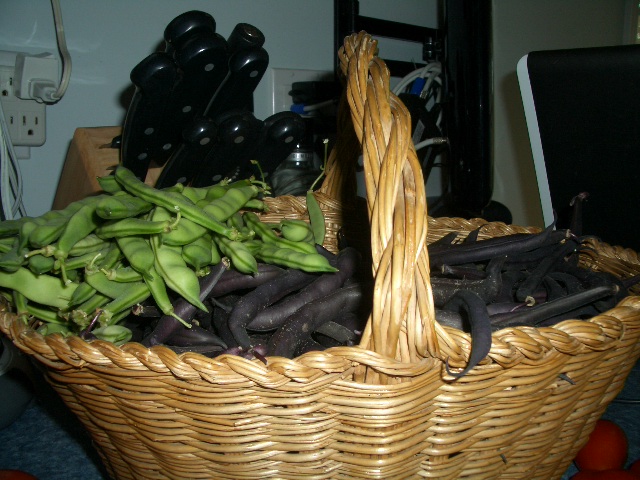
We’re growing both green bush beans and Royalty Purple Pod Beans.  We’ve eaten some for dinner a couple of times, given a lot away, and then this past weekend, when we returned from vacation, we picked all this:

Which I estimated was approximately 10 pounds of beans.  We gave away three equal quantities to our neighbors, and kept one for ourselves.  Our other neighbors, who also garden and are also buried in beans, made vague suggestions about doing a joint canning operation this week.  We shall see.  But just in case we don’t, and for some reason your CSA has buried you in beans, here are two great recipes for beans I really enjoy. 

Italian Green Bean Salad
by Kathy Kittell of Lenexa, KS – courtesy of Healthy Cooking June/July 2008

1 1/2 lbs fresh green beans, trimmed
1/2 cup fresh basil leaves, thinly sliced
1/2 cup thinly sliced roasted sweet red peppers
1 tbs pine nuts, toasted
2 tbs + 1 1/2 tsp olive oil
1 tbs lemon juice
1/4 tsp garlic powder
1/4 tsp pepper
1/8 tsp salt (I always omit this)
Additional fresh basil leaves, optional

Place beans in a large saucepan and cover with water.  Bring to a boil.  Cook, uncovered for 8 – 10 minutes or until crisp-tender.  Drain & immediately place in ice water.  Drain & pat dry.

Transfer to a salad bowl; add the basil, peppers and pine nuts.  In a small bowl, whisk the oil, lemon juice, garlic powder, pepper & salt (if using.)  Drizzle over bean mixture and toss to coat.  Garnish with additional basil if desired.

And here’s the recipe I made last night:  It’s a grilled green bean recipe, but I put everything into a microwave steamer bag and cook it for about 5 -6 minutes.  I wish I could figure out a way to keep the beans from turning green when they cook, because I think this would be a fabulous splash of color on the table if I could get them to stay purple.

Asian Grilled Green Beans
by Trisha Kruse of Eagle, ID – courtesy of Healthy Cooking (year unknown)

1 tbs brown sugar
1 tbs sesame oil
1 tbs reduced-sodium soy sauce
2 garlic cloves, minced
1/2 tsp crushed red pepper flakes
1 1/2 pounds fresh green beans, trimmed
1 medium red onion, halved & thinly sliced
6 medium fresh mushrooms, quartered

In a large bowl, combine the first firve ingredients.  Add the beans, onion & mushrooms; toss to coat.  Place half the vegetables on a double thickness of heavy-duty foil (about 18″ square); fold foil around vegetables and seal tightly.  Repeat with remaining vegetables.

Grill, covered over medium heat for 18-22 minutes or until beans are tender, turning packets over once.  Open foil carefully to allow steam to escape.

(Or put everything into a microwave steamer bag for 5-6 minutes – much easier.)

Perhaps fewer bean plants next year.  Perhaps.

It’s never too early for Pumpkin Spice Martinis!

The cocktail farmers have been on vacation this past week, which is why you haven’t heard much from us.  We have some very successful crops this year – peppers, beans and for the first time, watermelons – but those posts will be coming later.  Because I associate Labor Day with the start of fall, I am reprinting our pumpkin spice martini recipe from last October so you don’t have to go searching for it.  We use Hiram Walker’s pumpkin spice liqueur, which is where we got this recipe.

Pumpkin Spice Martini:

1 oz vanilla vodka
1 oz Bailey’s
1 1/2 oz pumpkin spice liqueur
dash of cinnamon and nutmeg

Combine the vodka, Bailey’s and pumpkin spice liqueur in a shaker with ice.  Pour evenly between two martini glasses, and sprinkle cinnamon and nutmeg on top.  Or pour it all into a single drinking glass and call it a “smoothie.”  I won’t tell.

Is it Happy Hour yet?